Magento 2
Overview
For Magento 2 stores, Zip offers an extension for integrating our payment method into your store.
Follow the steps in these guides to integrate Zip into your Magento 2 store:
If you have any questions or need any support integrating, please contact Partner Support.
Add the Payment Gateway
Compatibility
Zip extension requires Magento v.2.3.0 or above. Zip supports USD as Magento base currency.

Installation
Choose one of the installation methods described below.
Installation might require the assistance of a system integrator, developer, or IT resource to complete the process. Make sure to test the installation in a separate environment before doing this on live store.
> Install with Composer
This is the recommended installation method. Make sure you are familiar with Magento Composer workflow and everything is set accordingly on the project:
More information on Magento Composer.
- At Magento Marketplace, add the extension to the cart and go through the checkout process to be able to download with Composer (extension is free).
- Run following commands from command line:
composer require mr/quadpay
php bin/magento setup:upgrade
Follow any additional instructions from Magento.
> Install Manually
- At Magento Marketplace, add the extension to the cart, go through the checkout process and download
the extension (extension is free). - Create
app/code/MR/QuadPay/directories - Unzip the extension to newly created Zip directory
- Using the command line, run this command:
php bin/magento setup:upgrade
Follow any additional instructions from Magento.
Configuration
To enable and configure Zip, return to the Magento Admin Panel.
-
Go to Stores > Configuration > Sales > Payment Methods > Zip
-
Under Enabled, select Yes
-
Select Territory (United States)
-
Copy and paste the Client ID, Client Secret from the Zip Merchant Portal > Settings. (Take care not to add any additional spaces or characters to these fields.)
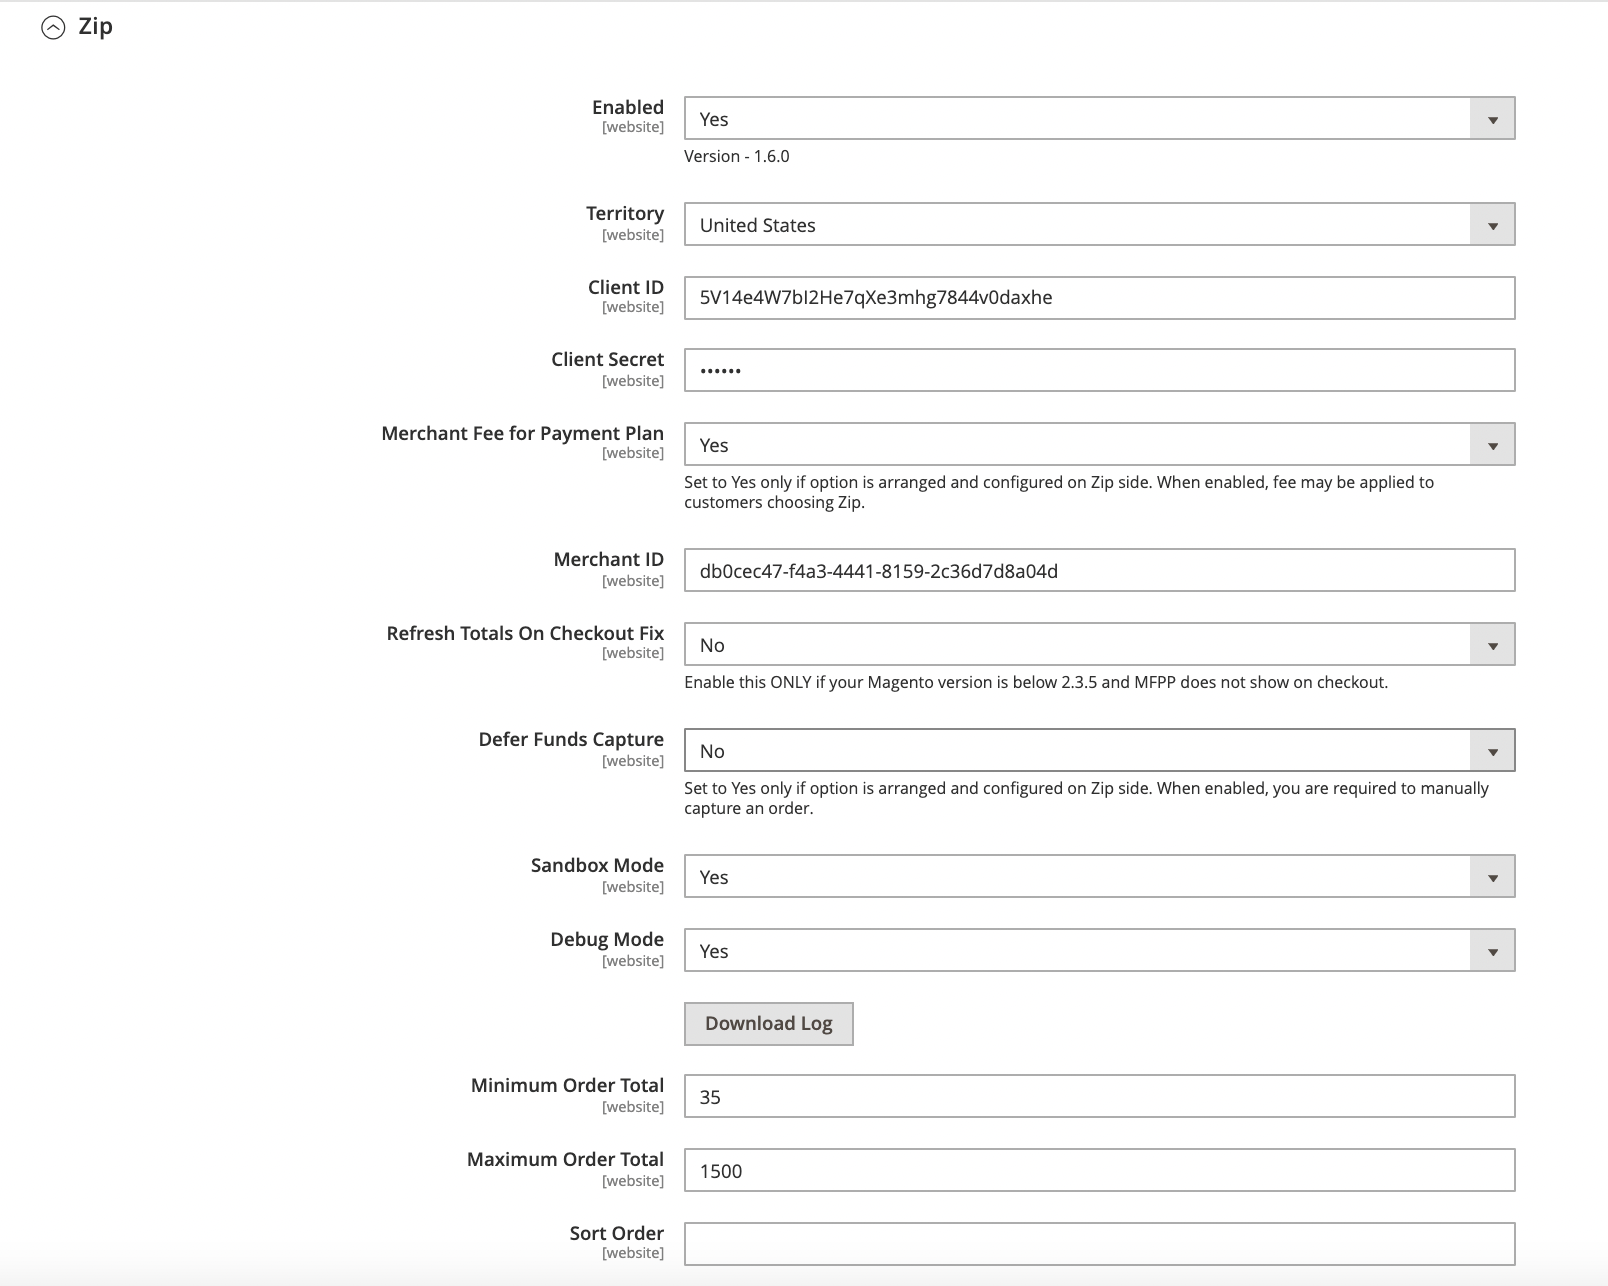
- Save and flush the cache after setup.
The Zip widget is automatically integrated as part of the extension and will be displayed on Product Detail Pages and at Cart upon enabling Zip in Magento administration.
Integrate the Widget
> Product Detail Page

> Cart Page
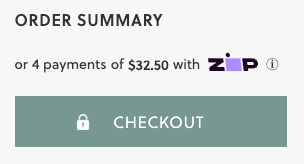
Widget Does not Appear
Have you tried refreshing the browser? If it still does not appear, please try flushing the cache.
Customize the Widget
Customizing the Widget
A technical background may be useful when attempting to customize the widget.
Many aspects of the widget can be customized. To find a complete list of items, please refer to the Zip widget documentation.
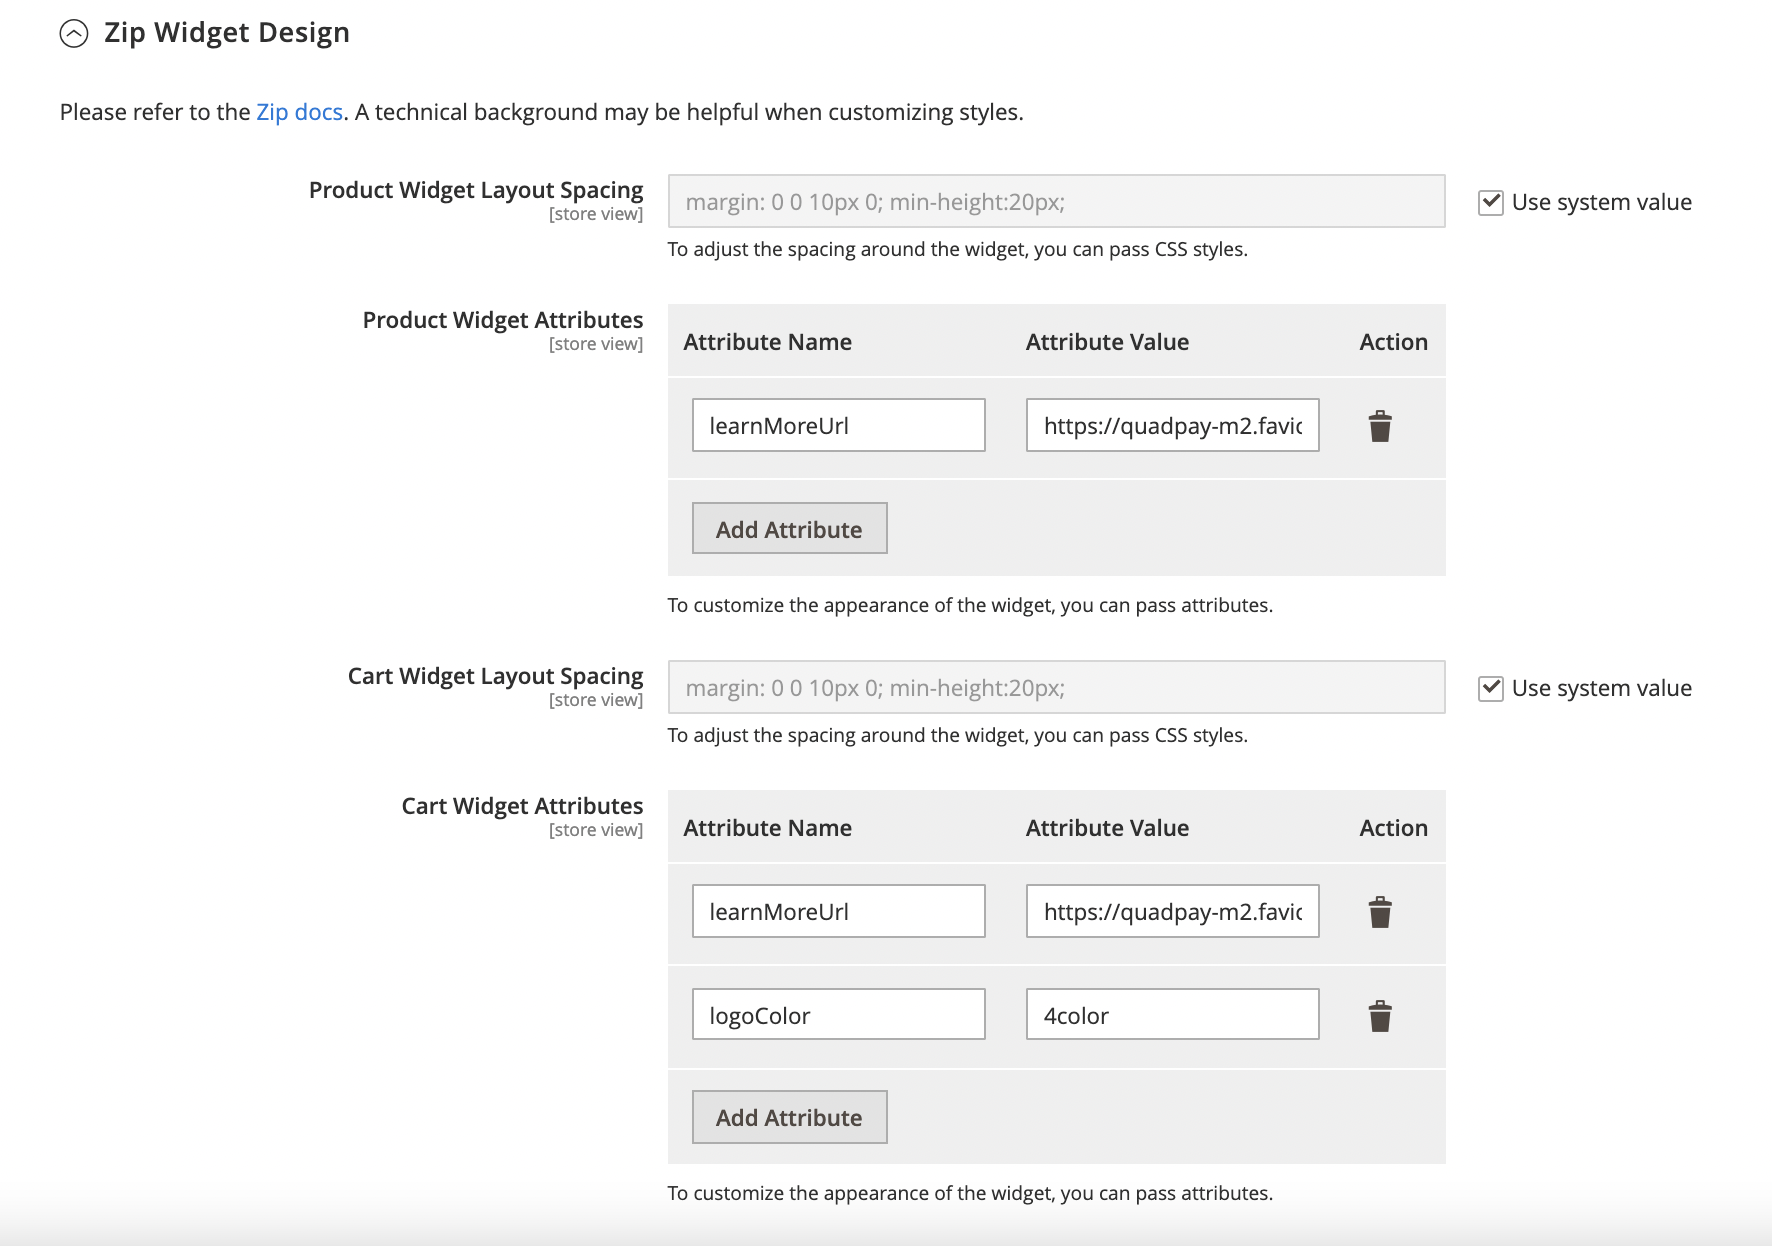
The widget styling can be adjusted in the Magento Admin Panel.
- Go to Stores > Configuration > Sales > Payment Methods > Zip > Zip Widget Design
- Adjust Product Widget Layout Spacing and Cart Widget Layout Spacing as necessary.
- Add attributes as necessary. For the full list of attributes, refer to the official documentation.
- Save your configuration.
Issuing Refunds
Issuing refunds for Zip orders is straightforward with the following instructions.
-
In the Magento Admin Panel, go to Sales > Invoices.
-
Find and click on the order to refund.
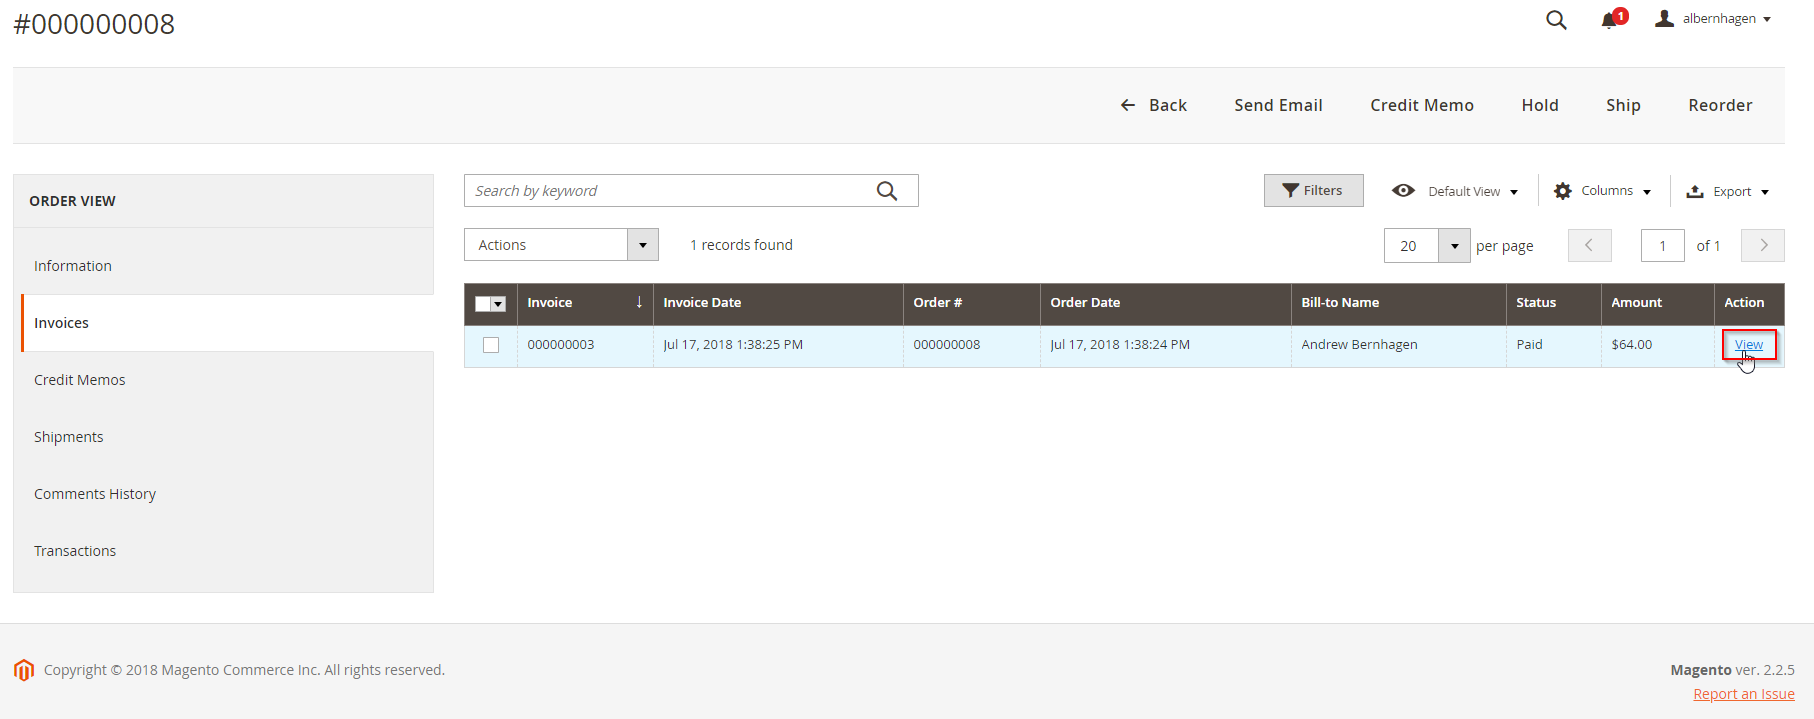
- Click the Credit Memo button.

- Update any refund values as needed. Then, click the Refund button.
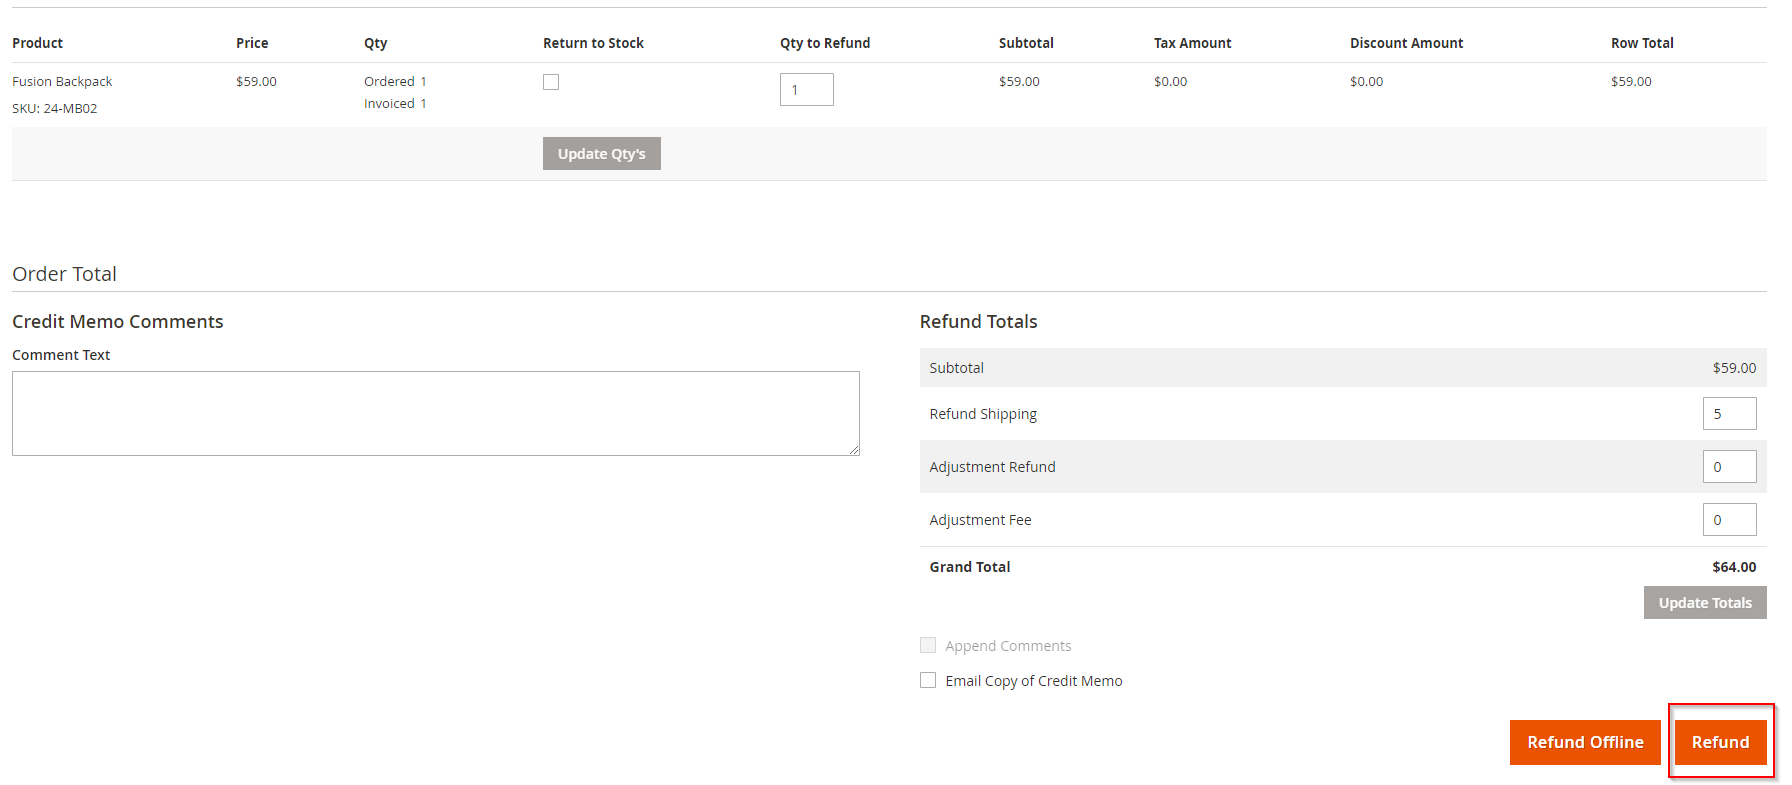
- After successful refund, note the status update at the top of the Order screen.

- Zip will automatically credit the customer's existing and/or future installments as needed. Verify the order status both by noting the Status of the order in the Magento Admin Panel and also in the Zip Merchant Portal (staging environment).
If the online store doesn't handle issuing refunds directly, the Zip Merchant Portal can be configured to issue refunds. Contact Partner Support to learn more.
Deferred Order Creation
Overview
If you are using an ERP or rely heavily on automation, we can assist you with setting up "Deferred Order Creation"(DOC) in Zip and Magento 2 to ensure that only successfully created Zip orders appear in your Magento 2 admin.
Steps to configure DOC in Magento 2:
- Reach out to our Partner Support team to request that Deferred Order Creation be enabled for your account.
2. Install the latest extension: Zip North America.
-
Set "Defer Order Creation: Yes" under the Zip settings in Stores > Configuration > Sales > Payment Methods.
-
Be sure to flush your Magento 2 cache after enabling this setting by navigating to System > Cache Management > Flush Magento Cache.
Updated 5 months ago
